
Tuesday, 24 November, 2020
Umbraco Basics – Manual Installation
Setting up and running an Umbraco website using Visual Studio 2015
When first getting started with Umbraco, especially if you've never seen or used it before, it can be difficult to understand. This post explains how to create and set-up an ASP.NET MVC project with Umbraco 7.5.7 on a Windows 10 machine using Visual Studio and IIS Express for evaluation, development or testing purposes.
The article assumes you’ve never installed Umbraco before and that you have limited knowledge of the Content Management System (CMS). It doesn't explain how to use Umbraco, if you'd like more information on using the CMS itself I recommend watching the basic getting started videos available for free on Umbraco-TV.
Installing Umbraco
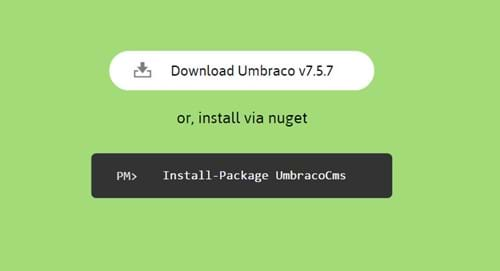
There are two common ways of installing Umbraco.
- Download the zip files and integrate them in to your project manually.
- Running the Umbraco Nuget package.
I'm going to be show you the manual method. Once you understand how to install Umbraco manually you may prefer to use the Nuget package to automate the process; I'll cover that in a future post.
Prerequisites
- Microsoft Visual Studio 2015 or higher; the free Community Edition is fine.
- IIS 7+; The version of IIS Express which ships with Visual Studio 2015 is fine.
- SQL Server 2014 Express or Developer Edition or later; SQL CE (Compact Edition) will work too, but not recommended.
Getting Umbraco
The latest version of Umbraco can be downloaded from https://our.umbraco.org/download/.
Creating the Web Project
Launch Visual Studio. Select File > New > Project. Choose your project name and location.

Select an empty project with the MVC libraries and folders option selected.
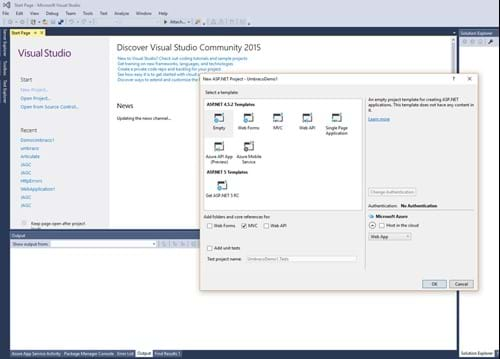
Click Okay to create the project.
Apply the Umbraco File Set
Find the zip file you downloaded earlier and copy the contents in to your project folder (the folder containing the .csproj file). Overwrite all existing files. This will install Umbraco's binaries, configuration files, razor templates, Back Offic, Angular JS, CSS and HTML.
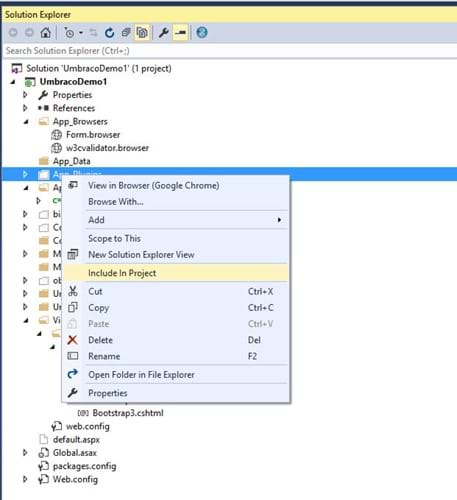
From the Solution Explorer tab, click the Refresh icon, then click the Show All Files Icon, and then right click each new folder and file shown (App_Browsers, App_Plugin, Umbraco, Umbraco_Client etc.) to include them in your project; the bin and obj folders should not be included.
Configure Umbraco
Click Build > Build Solution (F7 shortcut). Then once everything's built select Debug > Start Debugging (F5 Shortcut). It'll take a while but eventually Visual Studio will spin up the Umbraco installation web page in your browser using IIS Express.
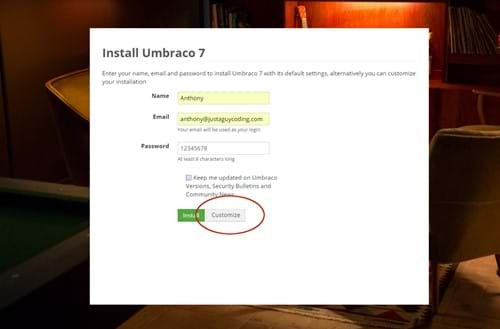
Enter a username and password for logging in to Umbraco. These are the credentials you will use to access Umbraco's Back Office admin section. Next, Click Customise (circled in red, you'd be amazed how easy this is to miss!).
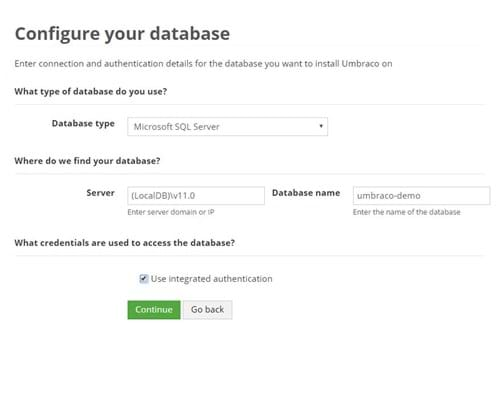
Configuring the Database
Next, select which database engine you would like to use, and provide the connection details. You have a choice of:
- SQL CE
- SQL Server
- SQL Azure
- MySQL
Although SQL CE (Compact Edition) is very easy to set-up, I'd recommend using either the Express or the Developer Edition of SQL Server which are both freely available. SQL Azure will work too but requires an Azure account with a SQL Server and database configured. MySQL is definitely not recommended, be prepared for a rough ride if you go that route.
If installing SQL Server and creating a new database seems like a step too far, you can go for the simplest, no fuss installation and select SQL CE. You can always install SQL Server later and reset the connection string in web.config to point to the new database.
If you decide to go with SQL Server or Azure you'll need to create a database on the server, and provide Umbraco with the Server name, database name and access credentials (I use Windows authentication on development machines).
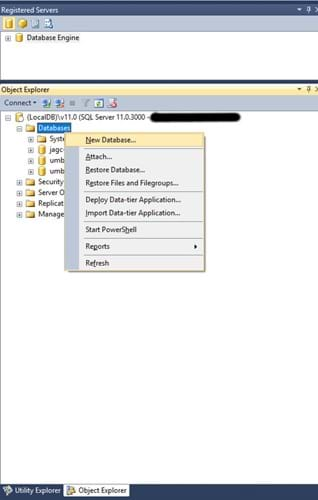
You can create a new database on your SQL Server using Visual Studio by selecting View > SQL Server Object Explorer,. Select Add SQL Server to connect to your server and manage it; right clicking on databases to add new databases. Or if, like me you don't like Visual Studios SQL Server tools, you can use Microsoft's SQL Server Management Studio to create the database instead (as shown below):
Once you've entered your (correct!) database information click Continue. You'll be asked whether you'd like to install a starter pack. If you've never used Umbraco before I strongly recommend you install one and use it to learn how to use Umbraco and create your own themes. Once you know how to add and create your own themes you wont need to install these starter packs any longer. For reference, starter packs are just Umbraco packages, and may be added and removed using Umbraco's package manager in the Back Office.
Umbraco will now set-up your database and starter pack website theme. After 1 to 2 minutes you should be taken to Umbraco's admin portal shown below:

Troubleshooting
- SQL CE: Sometimes after installing Umbraco to work with SQL CE, IIS will issue LoadLocker errrors. This is a known issue U4-2779 and is one of the reasons I don't recommend using SQL CE. These errors may be ignored (Click Continue) to run Umbraco.
Summary
Congratulations, you've created an ASP.NET MVC project, integrated it with Umbraco, built it, run it, installed and configured Umbraco, and served it on your local machine using IIS Express.
You can view the website, not the admin portal, by removing the /umbraco segment from the browser's URL.
The CMS web application runs and works like any other ASP.NET application, you can debug it, deploy it, just as you would any other ASP.NET application.
Want to Thank Me?
Did you like this article? Was it helpful? Why not buy me a coffee on Paypal? Buy me a coffee?